


How to Find Common Reasons for Sprinkler System Leaks
Last Updated: November 8, 2026
Quick Summary
Most sprinkler system leaks come from a short list of causes: damaged or cracked sprinkler heads, worn seals and gaskets, cracked underground pipes, leaking control valves, and loose fittings. Heat that dries out rubber seals and soil that shifts seasonally are common stressors. Checking heads, valve boxes, and your water meter with the system off can help you find the source.
Heads are often clipped by mowers or loosened by foot traffic, and sun cracks their plastic over time.
Pop a head up while the system runs; water seeping from the riser rather than the nozzle signals a worn seal.
Control valves leak most often at their connections, and a valve that won't shut off keeps water flowing.
Check your water meter with every fixture and zone off; a moving meter confirms a real leak.
Stop and call a professional if the leak is underground or the meter keeps climbing with zones off.
Table of Contents
Why Sprinkler System Leaks Happen
A sprinkler system leaks usually start small, with a wet patch, a soft spot in the lawn, or a water bill that climbs for no clear reason. Most leaks trace back to a short list of causes: damaged heads, worn seals, cracked pipes, failing valves, and loose fittings. Knowing where to look saves time and keeps a small problem from becoming a large repair.
Heat dries out rubber seals faster, and soil that shifts with seasonal changes can stress underground pipes. A system that runs on a set schedule can also hide a leak until the ground stays soggy for days.
Broken or cracked sprinkler heads
Worn or dried-out seals and gaskets
Cracked underground pipes
Leaking irrigation control valves
Loose or damaged fittings at connection points
Leaks that continue even when the system is off
Leaking Sprinkler Heads and Worn Seals
Sprinkler heads take the most abuse in a yard. Lawn mowers clip them, foot traffic loosens them, and sun and temperature swings crack the plastic over time.
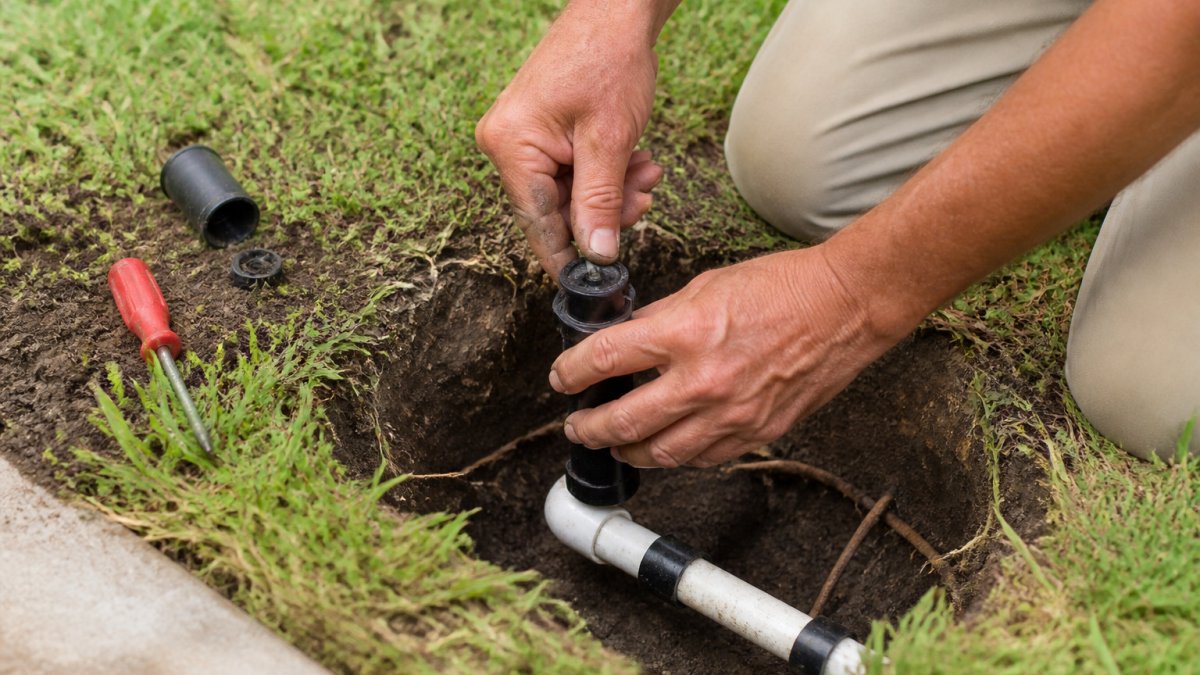
Worn seals cause a different kind of leak. Compare repairing versus replacing a worn head to decide the best fix. The rubber seal inside the head can dry out, crack, or get pushed out of place by grit. Water then seeps around the base instead of out of the nozzle.
Watch out: Do not dig around a head with a sharp tool while the system is on. Shut the zone off first, or you can damage the pipe underneath.
Sprinkler System Leaking at Valve Connections
Control valves sit in a box at ground level, and they leak most often at their connections. Valve diaphragms wear out, and debris can stop the valve from closing fully. When that happens, water keeps flowing into the zone even after the timer shuts it off.
Check the valve box for standing water, a hissing sound, or a constant trickle around the solenoid and the unions. Loose connections and cracked fittings are common culprits. A valve that will not shut off completely is a sign that the diaphragm or the debris inside needs attention.
Sprinkler Leaking From Base of the Head
When water pools around the base of a sprinkler head, the problem is usually below the surface. The riser may be cracked, the connection to the lateral line may be loose, or the head may sit at a low point where water collects. Dig gently around the base to see whether the leak is coming from the fitting or the pipe.
Many homeowners assume a wet spot near a head means the head itself is broken. Often the head is fine and the riser or fitting beneath it is the real source. Confirm before you replace anything.
Sprinkler System Leaking When Off: Drainage or a Real Leak?
A sprinkler system that drips or pools water after the timer shuts off is the single most misdiagnosed leak complaint. Some water release is designed into the system; some is a failure. The trick is telling them apart before you dig or replace a valve.
What low-head drainage is
Low-head drainage is the water that drains out of the lowest sprinkler heads in a zone once the valve closes. The lateral pipes stay full of water after each cycle, and gravity pulls that water toward the lowest point in the zone. If the lowest head sits a foot or two below the rest, it will weep water for a short time after shutoff. That is normal hydraulic behavior, not a leak.
Normal low-head drainage typically stops within a few minutes, depending on how much pipe the zone holds and how much elevation drop exists. A small puddle that fades and stops is expected. Water that keeps seeping for hours, or that reappears when the zone has not run at all, is not drainage.
How to tell drainage from an active leak
Use these signals to separate the two:
Timing. Drainage starts right at shutoff and tapers off. A leak continues at a steady rate long after the zone stopped.
Location. Drainage shows up only at the lowest heads. A leak can appear anywhere along the lateral line, at a fitting, or at the valve box.
Meter movement. With every zone off and no fixtures running, drainage will not move the water meter. A leaking valve or pipe will.
Recurrence. If the wet spot is dry before the zone runs and wet only afterward, drainage is likely. If the spot stays wet between cycles, suspect a valve that is not sealing.
When the cause is a valve, not elevation
A control valve that does not close fully will keep feeding the zone after the controller shuts it off. The symptom looks like drainage that never stops. Common causes are a worn diaphragm, grit or debris trapped on the valve seat, or a solenoid that is not seating properly. If the lowest heads weep continuously and the water meter creeps with the controller off, the valve is the more likely culprit than elevation.
Watch out: Do not assume a wet spot at the lowest head means the head is broken. Replacing the head will not fix a valve that keeps passing water, and you will still have the puddle.
When the cause is elevation
If the weeping is limited to the lowest heads, stops within a reasonable window, and the meter stays still with the system off, elevation is doing exactly what physics dictates. You can reduce the nuisance with check valves or pressure-compensating heads that hold water in the pipe, but the system is not leaking. Knowing this saves homeowners from paying for a repair that was never needed.
Water that keeps coming out of a zone after the timer shuts off can be normal drainage or a real leak, and the signals below help tell them apart.
Signal | Normal drainage | Active leak |
Timing | Starts at shutoff, then tapers off | Continues at a steady rate long after shutoff |
Location | Only the lowest heads | Anywhere on the lateral line, a fitting, or the valve box |
Water meter with system off | Does not move | Moves |
Between cycles | Spot dries before the zone runs again | Spot stays wet |
How to Check for Leaks in a Sprinkler System
The following step-by-step workflow can help narrow down a leak before anyone digs. If the pressure or flow problems persist, follow a step-by-step pressure troubleshooting guide to dig deeper. Work through it in order; each step rules out a category of cause so you are not guessing.

Shut down the controller. Turn the controller to OFF and confirm every zone is off. Do not rely on the rain sensor alone.
Walk the yard. Look for puddles, soggy areas, sinking soil, or a strip of unusually lush green grass that follows a zone layout.
Run one zone at a time. Watch each head for spray pattern, seepage at the base, or a low spot that pools water. Note which zone shows the problem.
Check the valve boxes. Open each box and look for standing water, a steady trickle, or a hissing sound around the solenoid and unions.
Isolate the problem zone. Repeat the head-by-head check on that zone alone so you are not chasing symptoms in zones that are fine.
Test the water meter. With every zone and fixture off, confirm whether water is still moving. This is the step that proves a leak exists.
Reading Your Water Meter
Your water meter is the quickest way to confirm a leak and estimate its size. Find the meter box, which is usually near the street.
For a measured test, write down the meter reading, wait one hour with no water use, and read it again. The difference is the water lost during that hour. Multiply by 24 to estimate daily loss, and compare that figure to your normal bill usage.
A rising meter with no running fixtures inside the home points strongly to an outdoor leak. If you see a jump in your water bill that you cannot explain, this test is the place to start.
Isolating the Source by Zone
If the meter moves with the controller off, close the isolation valve on the irrigation main line, if your system has one. If the meter stops, the loss is on the irrigation side. If it keeps moving, the loss may be on the domestic service line and worth a call to your water provider. Once you know the loss is in the irrigation system, open one zone valve at a time and watch the meter to see which zone draws water when it should be off.
Safety and DIY Limits
Checking heads, watching the meter, and opening a valve box are safe for most homeowners. Digging near buried lines, working inside a valve box with electrical solenoid wiring, or probing a pressurized main are not. Stop and call a professional if the leak is underground, if the meter keeps climbing after every zone is off, if the ground is sinking or heaving, or if you are unsure which line is pressurized.
Watch out: Never dig around a pressurized line or a valve box with the system on. Shut the water off at the isolation valve first, or you can damage a fitting and turn a small leak into a major repair.
When to Stop DIY and Call Talgarden for Sprinkler Repair
Some leaks are simple. Replacing a cracked head or a worn seal is a reasonable weekend job for many homeowners. Other problems call for a professional. Stop and call a pro if the leak is underground, if the meter keeps climbing after every zone is off, if the ground is sinking or heaving, or if digging near buried lines makes you uneasy.
Talgarden offers sprinkler repair in the Pasadena area, and free estimates are available. Schedule your estimate today.
FAQ sections are added separately.
Frequently Asked Questions
What is the most common cause of sprinkler system leaks?
The most common cause is a worn or damaged sprinkler head, especially a cracked casing or a worn seal that lets water escape at the head. Underground pipe damage and failing control valves are also frequent sources. A visual inspection of each zone while it runs usually reveals which component is failing, and a damaged head is typically the cheapest and simplest fix to start with.
Why is my sprinkler system leaking even when it's off?
Some water may drain back through the lines after a watering cycle, which is normal low-head drainage. A leak that continues for hours or days after the system is off usually points to a valve that does not seal fully, a cracked pipe below grade, or a head that is dripping. Checking whether the water stops within a short window after shutdown helps separate normal drainage from an active leak.
How can I tell whether a sprinkler head or valve is leaking?
Run one zone at a time and watch each head and the valve box. A head leaking at its base or around the cap points to a worn seal or cracked casing. Water pooling around a valve box, or a valve that keeps dripping when its zone is off, points to the valve itself. Puddles, soggy areas, and unexpected increases in your water bill are common signs that a leak needs attention.
When should I call a professional to repair a sprinkler leak?
Call a professional if the leak is underground, if you cannot locate the source, or if a valve or buried pipe is involved, since these repairs often require excavation and pressure testing. Also call if you see persistent wet areas or a sudden jump in your water bill. Talgarden offers expert sprinkler repair and free estimates for properties in the Pasadena area.

Comments